Complete Uptime Kuma Server Monitoring Setup with Notifications Tutorial
Server downtime costs businesses an average of $5,600 per minute according to Gartner’s 2023 IT Infrastructure report. Whether you’re running a SaaS platform, e-commerce site, or API service, proactive monitoring isn’t optional—it’s critical for maintaining customer trust and revenue streams. Uptime Kuma has emerged as the leading open-source monitoring solution, offering enterprise-grade features without the hefty price tag of commercial alternatives.
In this comprehensive tutorial, we’ll build a production-ready server monitoring system using Uptime Kuma with multi-channel notifications. You’ll learn to monitor HTTP endpoints, databases, SSL certificates, and custom services while setting up intelligent alerting that prevents notification fatigue.
What We’re Building: A Complete Monitoring Infrastructure
Our monitoring system will include:
- Multi-service monitoring: HTTP/HTTPS endpoints, databases (MySQL, PostgreSQL, MongoDB), SSL certificates, and ping monitoring
- Intelligent notifications: Email, Slack, Discord, Telegram, and webhook integrations with escalation policies
- Status pages: Public and private status pages for stakeholder communication
- Performance tracking: Response time monitoring with historical data and trend analysis
- Maintenance windows: Scheduled maintenance periods to prevent false alerts
Pro tip: Uptime Kuma supports over 90 notification providers out of the box, making it more versatile than paid alternatives like Pingdom ($15/month) or StatusCake ($24.99/month).
Prerequisites and Technology Stack
Before diving into implementation, ensure you have:
System Requirements
- Server: VPS with minimum 1GB RAM, 1 CPU core, 10GB storage
- Operating System: Ubuntu 20.04+ or CentOS 8+
- Domain: Subdomain for accessing Uptime Kuma (e.g., monitoring.yourdomain.com)
- SSL Certificate: Let’s Encrypt or commercial certificate
Technology Stack
| Component | Technology | Purpose |
|---|---|---|
| Monitoring Engine | Uptime Kuma v1.23+ | Core monitoring and alerting |
| Runtime | Node.js 18+ | Application runtime |
| Database | SQLite (built-in) | Configuration and metrics storage |
| Web Server | Nginx | Reverse proxy and SSL termination |
| Process Manager | PM2 | Application lifecycle management |
| Containerization | Docker (optional) | Isolated deployment |
External Services
- Notification providers: Slack workspace, email SMTP, Discord server
- Cloud deployment: Railway for managed hosting (optional)
- Analytics integration: Plausible for status page analytics
Step-by-Step Implementation
Step 1: Server Preparation and Dependencies
Start by updating your system and installing required dependencies:
# Update system packages
sudo apt update && sudo apt upgrade -y

# Install Node.js 18 LTS
curl -fsSL https://deb.nodesource.com/setup_18.x | sudo -E bash -
sudo apt-get install -y nodejs

# Install additional dependencies
sudo apt install -y nginx certbot python3-certbot-nginx git

# Install PM2 globally
sudo npm install -g pm2

# Verify installations
node --version  # Should show v18.x.x
npm --version   # Should show 9.x.x
Step 2: Uptime Kuma Installation
Create a dedicated user and install Uptime Kuma:
# Create uptime user
sudo useradd -m -s /bin/bash uptime
sudo su - uptime

# Clone Uptime Kuma repository
git clone https://github.com/louislam/uptime-kuma.git
cd uptime-kuma

# Install dependencies and build
npm ci --production
npm run download-dist

# Create data directory
mkdir -p data

# Set proper permissions
chmod 755 data
Step 3: Configuration and Environment Setup
Create a production configuration file:
# Create environment configuration
cat > .env << 'EOF'
# Server Configuration
UPTIME_KUMA_PORT=3001
UPTIME_KUMA_HOST=127.0.0.1

# Database Configuration
UPTIME_KUMA_DB_PATH=./data/kuma.db

# Security Settings
UPTIME_KUMA_DISABLE_FRAME_SAMEORIGIN=false
UPTIME_KUMA_CLOUDFLARED_TOKEN=your_cloudflare_token_here

# Notification Settings
UPTIME_KUMA_LOG_LEVEL=info
EOF
Create a PM2 ecosystem file for process management:
# Create PM2 configuration
cat > ecosystem.config.js << 'EOF'
module.exports = {
  apps: [{
    name: 'uptime-kuma',
    script: 'server/server.js',
    cwd: '/home/uptime/uptime-kuma',
    env: {
      NODE_ENV: 'production',
      UPTIME_KUMA_PORT: '3001',
      UPTIME_KUMA_HOST: '127.0.0.1'
    },
    instances: 1,
    exec_mode: 'fork',
    watch: false,
    max_memory_restart: '500M',
    error_file: './logs/err.log',
    out_file: './logs/out.log',
    log_file: './logs/combined.log',
    time: true
  }]
};
EOF

# Create logs directory
mkdir -p logs
Step 4: Nginx Reverse Proxy Configuration
Configure Nginx as a reverse proxy with SSL:
# Exit uptime user session
exit

# Create Nginx configuration
sudo cat > /etc/nginx/sites-available/uptime-kuma << 'EOF'
server {
    listen 80;
    server_name monitoring.yourdomain.com;
    return 301 https://$server_name$request_uri;
}

server {
    listen 443 ssl http2;
    server_name monitoring.yourdomain.com;

    # SSL Configuration
    ssl_certificate /etc/letsencrypt/live/monitoring.yourdomain.com/fullchain.pem;
    ssl_certificate_key /etc/letsencrypt/live/monitoring.yourdomain.com/privkey.pem;
    ssl_protocols TLSv1.2 TLSv1.3;
    ssl_ciphers ECDHE-RSA-AES128-GCM-SHA256:ECDHE-RSA-AES256-GCM-SHA384;
    ssl_prefer_server_ciphers off;
    ssl_session_cache shared:SSL:10m;
    ssl_session_timeout 10m;

    # Security Headers
    add_header X-Frame-Options "SAMEORIGIN" always;
    add_header X-XSS-Protection "1; mode=block" always;
    add_header X-Content-Type-Options "nosniff" always;
    add_header Referrer-Policy "no-referrer-when-downgrade" always;
    add_header Content-Security-Policy "default-src 'self' http: https: data: blob: 'unsafe-inline'" always;

    # Proxy Configuration
    location / {
        proxy_pass http://127.0.0.1:3001;
        proxy_http_version 1.1;
        proxy_set_header Upgrade $http_upgrade;
        proxy_set_header Connection 'upgrade';
        proxy_set_header Host $host;
        proxy_set_header X-Real-IP $remote_addr;
        proxy_set_header X-Forwarded-For $proxy_add_x_forwarded_for;
        proxy_set_header X-Forwarded-Proto $scheme;
        proxy_cache_bypass $http_upgrade;

        # WebSocket support
        proxy_set_header Sec-WebSocket-Extensions $http_sec_websocket_extensions;
        proxy_set_header Sec-WebSocket-Key $http_sec_websocket_key;
        proxy_set_header Sec-WebSocket-Version $http_sec_websocket_version;

        # Timeouts
        proxy_connect_timeout 60s;
        proxy_send_timeout 60s;
        proxy_read_timeout 60s;
    }

    # Rate limiting
    limit_req_zone $binary_remote_addr zone=uptime:10m rate=10r/m;
    limit_req zone=uptime burst=20 nodelay;
}
EOF

# Enable the site
sudo ln -s /etc/nginx/sites-available/uptime-kuma /etc/nginx/sites-enabled/
sudo nginx -t
sudo systemctl reload nginx
Step 5: SSL Certificate Setup
Obtain and configure SSL certificates:
# Obtain SSL certificate
sudo certbot --nginx -d monitoring.yourdomain.com

# Set up automatic renewal
sudo crontab -e
# Add this line:
0 12 * * * /usr/bin/certbot renew --quiet
Step 6: Service Startup and Initial Configuration
Start Uptime Kuma and configure the initial setup:
# Switch to uptime user
sudo su - uptime
cd uptime-kuma

# Start with PM2
pm2 start ecosystem.config.js
pm2 save
pm2 startup

# Exit and run the startup command as root
exit
# Run the command provided by PM2 startup (as root)
Access your Uptime Kuma installation at https://monitoring.yourdomain.com and complete the initial setup:
- Create an admin account with a strong password
- Configure basic settings (timezone, language)
- Set up your first monitor
Notification Configuration
Email Notifications via SMTP
Configure email notifications for critical alerts:
- Navigate to Settings → Notifications
- Click “Add New notification”
- Select “Email (SMTP)” as the notification type
- Configure SMTP settings:
Friendly Name: Production Alerts
SMTP Host: smtp.gmail.com
SMTP Port: 587
Security: STARTTLS
Username: your-monitoring@yourdomain.com
Password: your-app-password
From Email: your-monitoring@yourdomain.com
To Email: alerts@yourdomain.com
CC: ops-team@yourdomain.com
Slack Integration
Set up Slack notifications for team collaboration:
- Create a Slack webhook URL in your workspace
- Add Slack notification in Uptime Kuma:
Notification Type: Slack
Friendly Name: Ops Team Slack
Slack Webhook URL: https://hooks.slack.com/services/YOUR/WEBHOOK/URL
Username: Uptime Kuma
Channel: #alerts
Icon Emoji: :warning:
Advanced Notification Rules
Create intelligent notification policies to prevent alert fatigue:
| Alert Level | Condition | Notification Method | Escalation Time |
|---|---|---|---|
| Warning | Response time > 2s | Slack only | N/A |
| Critical | Service down > 1 min | Email + Slack | 5 minutes |
| Emergency | Multiple services down | Email + Slack + SMS | Immediate |
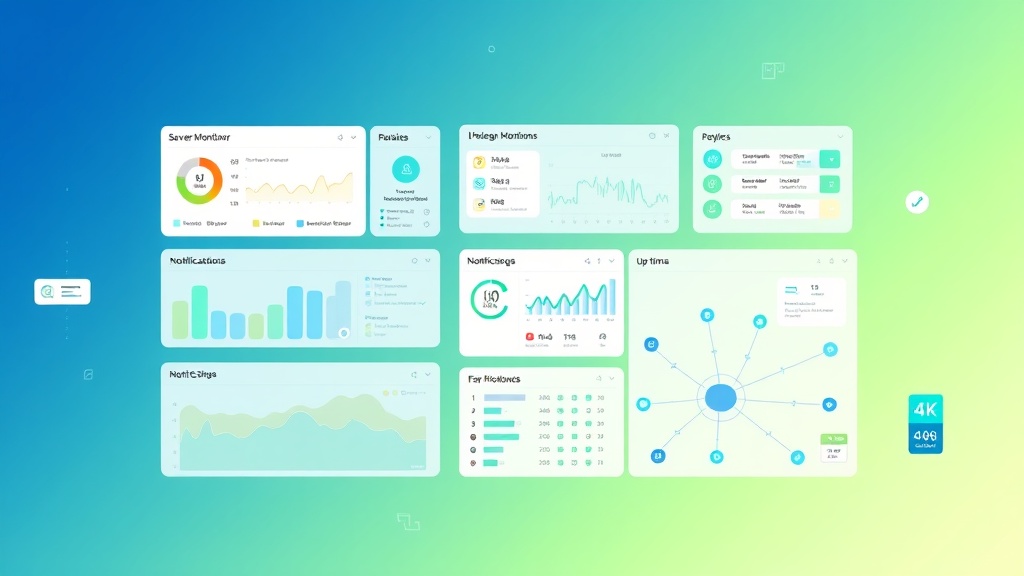
Monitor Configuration
HTTP/HTTPS Monitoring
Configure comprehensive web service monitoring:
Monitor Type: HTTP(s)
Friendly Name: Main Website
URL: https://yourdomain.com
Heartbeat Interval: 60 seconds
Retries: 3
Heartbeat Retry Interval: 60 seconds
HTTP Method: GET
Expected Status Codes: 200-299
Follow Redirects: Yes
Ignore TLS/SSL Error: No
Timeout: 48 seconds
Add advanced HTTP monitoring features:
- Keyword monitoring: Check for specific text on pages
- Response time thresholds: Alert when response time exceeds 2 seconds
- HTTP headers validation: Verify security headers are present
- Certificate monitoring: Alert 30 days before SSL expiration
Database Monitoring
Monitor database connectivity and performance:
# PostgreSQL Monitor
Monitor Type: PostgreSQL
Friendly Name: Production Database
Hostname: db.yourdomain.com
Port: 5432
Database: production
Username: monitoring_user
Password: secure_password
Query: SELECT 1;
Heartbeat Interval: 300 seconds
API Endpoint Monitoring
For API services, implement comprehensive endpoint testing. If you’re using n8n for workflow automation, you can create sophisticated API testing scenarios that validate not just connectivity but also response data integrity.
# API Health Check
Monitor Type: HTTP(s)
Friendly Name: API Health Endpoint
URL: https://api.yourdomain.com/health
HTTP Method: GET
Headers: {
  "Authorization": "Bearer your-api-key",
  "Content-Type": "application/json"
}
Expected Response: {"status": "healthy"}
Timeout: 30 seconds
Testing and Validation
Monitor Testing Protocol
Validate your monitoring setup with systematic testing:
- Connectivity tests: Verify all monitors can reach their targets
- Notification tests: Send test alerts to all configured channels
- Failover scenarios: Simulate service outages to test response times
- Performance validation: Ensure monitoring doesn’t impact target services
Load Testing Your Monitoring System
Test Uptime Kuma’s performance under load:
# Install Apache Bench for load testing
sudo apt install apache2-utils

# Test concurrent connections
ab -n 1000 -c 10 https://monitoring.yourdomain.com/

# Monitor system resources during testing
htop
iostat 1 10
Validation Checklist
- ✅ All monitors report “Up” status
- ✅ Email notifications delivered within 60 seconds
- ✅ Slack notifications appear in correct channels
- ✅ Status page displays accurate information
- ✅ SSL certificate monitoring works correctly
- ✅ Database connectivity tests pass
- ✅ Response time tracking shows realistic values
Production Deployment and Hardening
Security Configuration
Implement production-grade security measures:
# Configure fail2ban for brute force protection
sudo apt install fail2ban

# Create Uptime Kuma jail
sudo cat > /etc/fail2ban/jail.local < /etc/fail2ban/filter.d/uptime-kuma.conf << 'EOF'
[Definition]
failregex = ^.*"(GET|POST).*" (401|403|404|500) .*$
ignoreregex =
EOF

# Restart fail2ban
sudo systemctl restart fail2ban
Backup Strategy
Implement automated backups for monitoring data:
# Create backup script
sudo cat > /home/uptime/backup-uptime-kuma.sh </dev/null; echo "0 2 * * * /home/uptime/backup-uptime-kuma.sh") | crontab -
Performance Optimization
Optimize Uptime Kuma for production workloads:
# Update PM2 configuration for better performance
cat > /home/uptime/uptime-kuma/ecosystem.config.js << 'EOF'
module.exports = {
  apps: [{
    name: 'uptime-kuma',
    script: 'server/server.js',
    cwd: '/home/uptime/uptime-kuma',
    env: {
      NODE_ENV: 'production',
      UPTIME_KUMA_PORT: '3001',
      UPTIME_KUMA_HOST: '127.0.0.1',
      UV_THREADPOOL_SIZE: '128'
    },
    instances: 1,
    exec_mode: 'fork',
    watch: false,
    max_memory_restart: '1G',
    node_args: '--max-old-space-size=1024',
    error_file: './logs/err.log',
    out_file: './logs/out.log',
    log_file: './logs/combined.log',
    time: true,
    kill_timeout: 5000,
    restart_delay: 1000
  }]
};
EOF
Enhancement Ideas and Advanced Features
Custom Status Pages
Create branded status pages for customer communication:
- Public status page: Display service availability to customers
- Maintenance scheduling: Announce planned downtime
- Historical data: Show 30/90-day uptime statistics
- Incident communication: Real-time updates during outages
Integrate with Plausible for privacy-focused analytics on your status page usage.
Integration with External Tools
Enhance monitoring capabilities with third-party integrations:
| Integration | Purpose | Implementation |
|---|---|---|
| PagerDuty | Incident escalation | Webhook notifications |
| Grafana | Advanced dashboards | Prometheus metrics export |
| Datadog | Infrastructure correlation | Custom metric forwarding |
| Jira | Automatic ticket creation | REST API integration |
Advanced Monitoring Scenarios
Implement sophisticated monitoring patterns:
- Multi-region monitoring: Deploy Uptime Kuma instances in different geographic regions
- Dependency mapping: Create monitor groups that reflect service dependencies
- Synthetic transactions: Monitor complete user workflows, not just endpoints
- Performance baselines: Set dynamic thresholds based on historical performance
Automation and Orchestration
Combine monitoring with automated responses using webhook integrations. You can trigger automated remediation workflows, scale infrastructure resources, or notify on-call engineers through intelligent routing.
Advanced users can integrate Uptime Kuma with infrastructure-as-code tools to automatically provision monitoring for new services as they’re deployed.
Frequently Asked Questions
How many monitors can Uptime Kuma handle on a single instance?
A properly configured Uptime Kuma instance on a 2GB RAM server can efficiently handle 200-300 monitors with 60-second intervals. For larger deployments, consider horizontal scaling with multiple instances or reducing check frequencies for non-critical services. Performance depends on monitor types—HTTP checks are lighter than database connectivity tests.
What’s the difference between Uptime Kuma and commercial alternatives like Pingdom?
Uptime Kuma offers 90+ notification providers compared to Pingdom’s limited options, costs $0 versus Pingdom’s $15/month minimum, and provides complete data ownership. However, Pingdom offers global probe networks and advanced analytics. For most businesses, Uptime Kuma’s feature set exceeds requirements while eliminating ongoing costs.
How do I prevent notification spam during maintenance windows?
Uptime Kuma supports maintenance windows where you can schedule planned downtime periods. During these windows, monitors continue running but notifications are suppressed. Additionally, configure notification groups with different escalation policies—send Slack notifications immediately but delay email alerts by 5 minutes to reduce noise from brief outages.
Can Uptime Kuma monitor services behind firewalls or in private networks?
Yes, deploy Uptime Kuma within your private network or VPC to monitor internal services. For hybrid scenarios, use VPN connections or configure firewall rules to allow monitoring traffic from your Uptime Kuma instance. You can also run multiple Uptime Kuma instances—one for public services and another for internal infrastructure.
Building robust server monitoring with Uptime Kuma transforms your operational capabilities while maintaining cost efficiency. This comprehensive setup provides enterprise-grade monitoring without the enterprise price tag, giving you complete visibility into your infrastructure health.
Ready to take your monitoring to the next level? futia.io’s automation services can help you integrate Uptime Kuma with your existing DevOps pipeline, create custom notification workflows, and build comprehensive monitoring strategies tailored to your infrastructure needs.
🛠️ Tools Mentioned in This Article